
North Inch Golf Course
Hole 1
Inch Royal
YARDS
PAR
STROKE
368
4
4
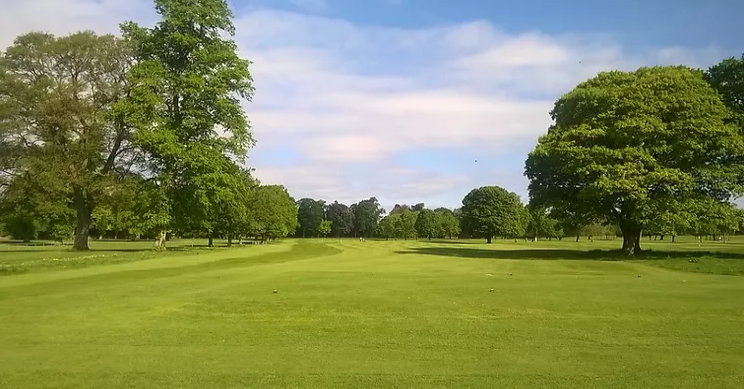
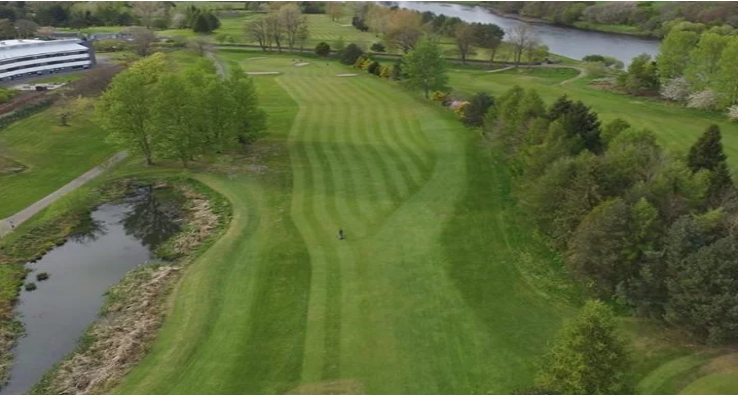
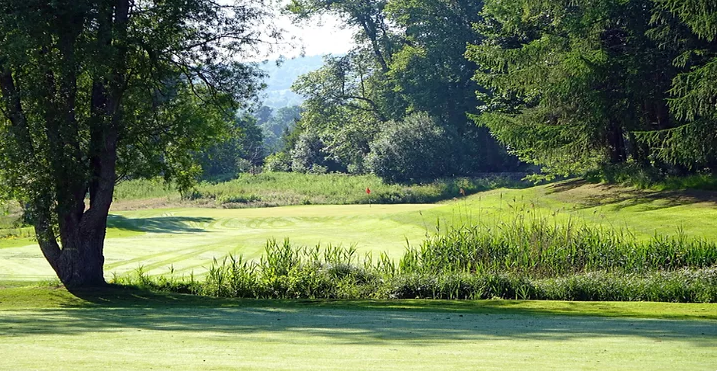
The opening hole at the North Inch is a seemingly innocuous par 4 but with out of bounds lurking down the left side and several large trees to avoid on the right you can’t take your opening tee shot too lightly! At 368 yards from the Red tees, the hole requires a driver for most players. Add in some first tee nerves and any shot landing on the fairway should be seen as a success!
The ideal line from the tee is the left side of the fairway to take advantage of the slight right to left slope which can kick your ball forward and onto a flat lie. Any shot up the right side can result in a hanging or downhill lie and a longer approach shot to the green.
There are no bunkers to worry about on the first hole, but that can make judging your approach shot difficult – top tip- it’s further than it looks so take an extra club!
Hole 2
Kinnoull Hill
YARDS
PAR
STROKE
349
4
12
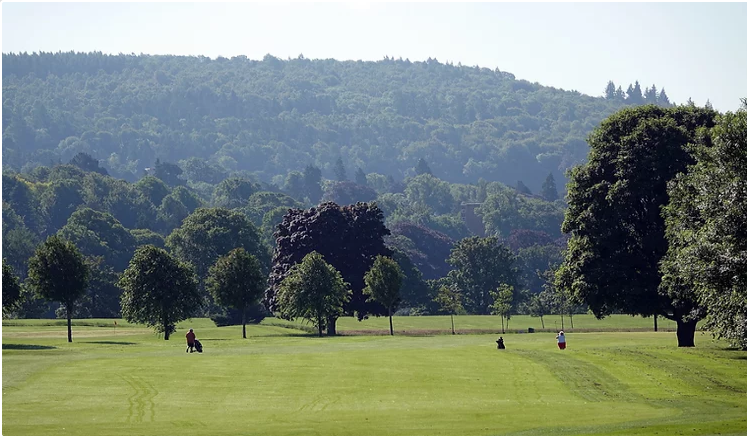
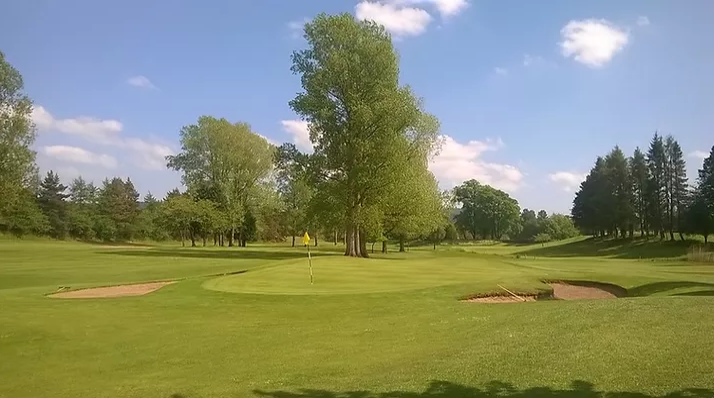
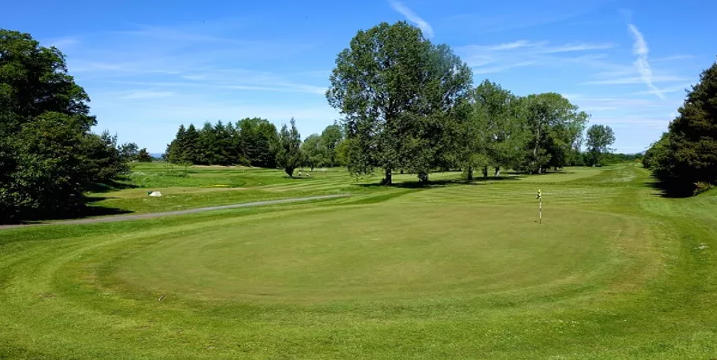
From the 2nd tee take a moment to admire the view of Kinnoull Hill before trying to keep your tee shot down the left side avoiding the large trees to the right of the fairway. This gives you the best angle in for your second shot to the two tiered green. The green has a narrow opening and a bunker gathers anything short or left, so beware of any flags tucked away on the left side of the green! Aim for the middle/right of the green and give yourself a chance of a birdie putt!
Hole 3
The Witches
YARDS
PAR
STROKE
442
5
8
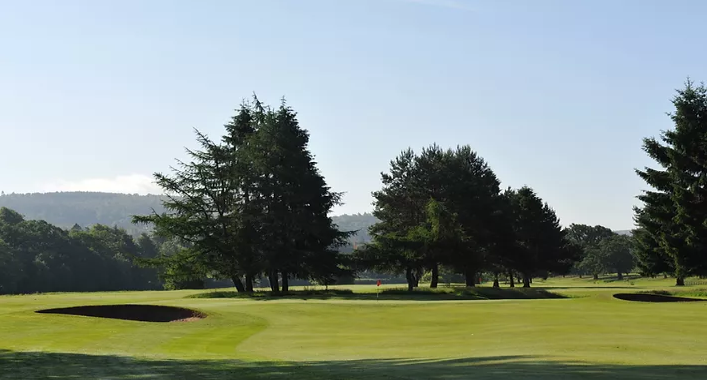
A par on the 3rd hole feels like a birdie!
At 442 yards from the Red tees, the 3rd will likely be a 3 shot hole – especially playing into the prevailing left to right wind. A slight dog-leg right to left makes what looks like a forgiving fairway actually quite tight. Even for longer hitters, anything up the left side of the fairway and you will have to move the ball right to left to have a chance of making the green – stray too far right however and you might be playing your second shot from under some low hanging branches!
Having negotiated the tee shot, you then have a long second shot slightly downhill to a large, slightly raised green which slopes from front to back. A large tree overhangs the front right of the green, so bear this in mind if choosing to lay up, as it obstructs any approach from the right of the fairway. The safe play here is to aim to the left of the green and take your two putts or more likely a chip and a putt for your par!
Hole 4
Jimmy Thomson
YARDS
PAR
STROKE
117
3
14
Named after the former greenkeeper at the North Inch, the 4th hole is a short but tricky par 3 with deep greenside bunkers waiting to punish any errant shots. At 117 yards from a raised tee to a fairly flat green, the trick is to pick the right club to carry the bunkers but still hold the putting surface. Better to be long than short here though!
Hole 5
Pond
YARDS
PAR
STROKE
277
4
6
This is a fairly short par 4 with a generous fairway to aim for. Two fairway bunkers around 50 yards short of the green are the main obstacles to avoid, so aim to be short of these and you should have a straightforward pitch to the green.
There’s also out of bounds along the left of the hole,marked by the public pathway.
The green is flat with a bunker to the right and another lurking out of sight behind the green, but avoid these and you‘ve a good chance of a par.
Hole 6
Cottars
YARDS
PAR
STROKE
114
3
16
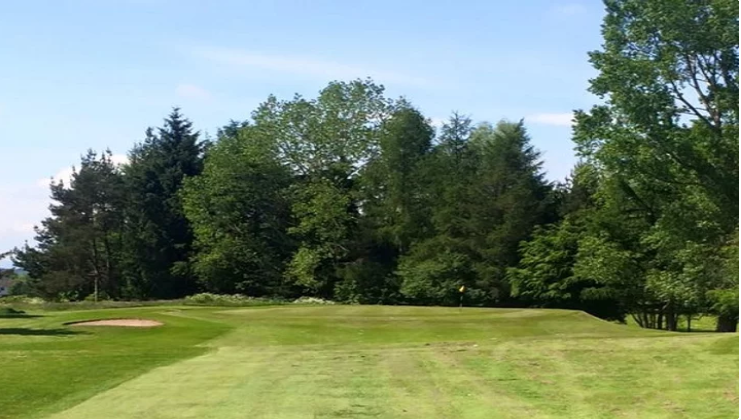
Another short par 3 but this one is definitely not as easy as it looks!
From the tee you hit over a valley towards a plateau green surrounded by steep bankings and trees. Anything short of the green gets swept down into the rough leaving a blind pitch back up to the raised green. Any ball missing the green long or to the right will skip off down the banking – possibly never to be seen again!
Best to ignore the flag here and be content with the middle of the green!
Hole 7
Annie's Well
YARDS
PAR
STROKE
321
4
2
A real risk and reward hole this one.
The only blind tee shot on the North Inch. the percentage shot here is to take a shorter club from the tee and take advantage of the steep left to right slope in the fairway, to kick your ball onto the flat and wide section of fairway. This gives you an approach of around 130-140 yards to a tricky green sloping from left to right and is guarded on both sides by bunkers.
Keep an eye out for the original well that the hole gets its name from, oh and don’t forget to ring the bell on the left to let the group behind know it’s safe to play!

Hole 8
Palace
YARDS
PAR
STROKE
301
4
10
There’s trouble up the left in the shape of trees and an out of bounds line further up so favour the right side from the tee, as the fairway opens up slightly.
The green normally plays firm and fast and slopes sharply from back to front, so you have the choice of running the ball in low and using the slopes or taking the aerial route but beware of the three small bunkers to the right of the green and the run off area to the left which gathers any shot that’s slightly pulled.
Hole 9
Wee Dunt
YARDS
PAR
STROKE
86
3
18
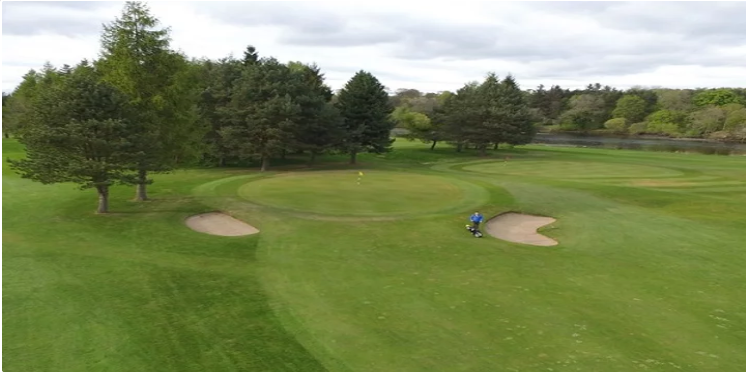
One of the iconic par 3’s at the North Inch, don’t let its short length lull you into thinking this is an easy one - many a promising front 9 has been ruined by the “Wee Dunt”!
A raised tee makes club selection tricky and the narrow green with slopes all around means that if you miss the putting surface a bogey four is the most likely outcome. The narrow front portion of the green brings the cavernous greenside bunkers into play, if your preferred shot is the low runner, while those who choose to fly it high into the 9th need to be accurate as the small green can lead to some treacherous pin positions! Leaving the ball short of the flag should guarantee you an uphill putt – hopefully for a birdie not a bogey!
Hole 10
Tremmlin Trees
YARDS
PAR
STROKE
147
3
15
Generally played into the wind, the 10th hole can prove to be a fiddly green to hit. Two deep bunkers left and right catch any shot which comes up short of the raised green, so be sure to allow for the wind and take enough club to clear the sand. There is a gap in between the bunkers but you have to be very accurate to run the ball up the steep bank to the green. A large tree guards the right side of the putting surface so your best line is slightly to the left of centre. A raised banking surrounds the green to the left and to the rear which can be used as a backstop to steer your ball back onto the green but beware – go over the banking and deep rough awaits!
Hole 11
Burnbrae
YARDS
PAR
STROKE
352
4
1
A challenging dog-leg par four this one. From either set of tees the aim is the same – get as close to the corner of the dog-leg as you can, while keeping it on the fairway. Even the best tee shot will still leave an approach of around 150-170 yards so you’ll want to be hitting from the short stuff if possible! Going too far right brings trees, a pond and a burn into play so middle/left is safer but remember – the further left you go the longer your second shot will be.
If you are far enough down the fairway to be able to go for the green with your second shot then you’ve done well, but the job’s far from finished yet! The upturned saucer of a green is long and narrow, slopes from back to front and anything not finding the middle invariably runs off into the semi rough leaving a tricky chip back. One saving grace is the large banking to the right of the green which often kicks a wayward second shot back into play.
In short – another hole where a par feels like a birdie!

Hole 12
Bute Drive
YARDS
PAR
STROKE
342
4
7
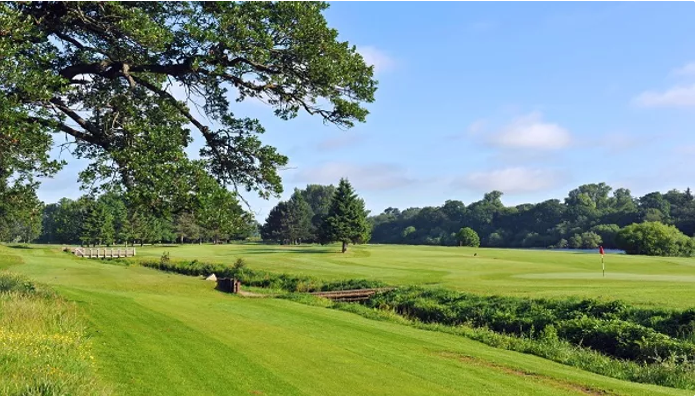
After the trials of the 11th, the 12th hole can appear to be a welcome relief but it’s not without its challenges.
The tee shot over the burn has to be straight to find the tree-lined fairway. The left side is favourable as this takes the large fairway bunker and overhanging tree branches on the right out of play and sets up the best approach to the green.
A slight dip in the fairway makes the green appear closer than it is so be sure to check your yardages and take enough club. The green also slopes slightly from back to front, so you really can attack the flag on this one but beware of right hand pin positions – there’s a bunker lurking to punish any mis-hits!
Hole 13
Lang Whang
YARDS
PAR
STROKE
419
5
9
With out of bounds along the entire left side of the hole, a large fairway bunker on the right, overhanging trees and a burn around 70 yards short of the green, there are no shortage of obstacles to negotiate.
Where your tee shot ends up will determine how you play the hole; too far right and the bunker awaits. Even if you manage to avoid the bunker, the overhanging branches from the mature trees lining the fairway force you into playing a low runner to escape. The left side of the fairway gives the best angle for the second shot but brings the out of bounds into play.
From the fairway it’s a simple lay up short of the burn or, if you’re feeling adventurous, have a crack at the green with a fairway wood. The green itself is one of the larger putting surfaces on the Inch and there can be as much as a two club difference between the forward pin position and the back so you’ll need to factor this in even if you take the lay-up option.
Hole 14
Sand Hole
YARDS
PAR
STROKE
189
3
13
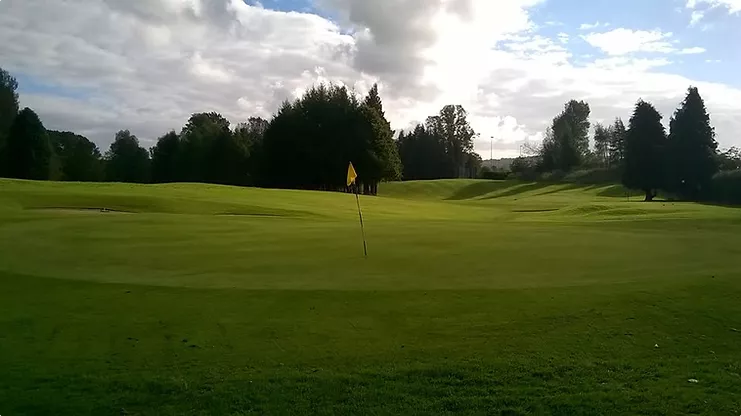
The longest par 3 on the North Inch, Sand Hole is a tough test in any conditions. Two huge bunkers protect the front of the green at each side and give the 14th its name. These aren’t the only defence however. The multi-tiered green rises up between the bunkers and slopes from front to back. so any tee shot finishing short leaves an uphill chip shot to a green which slopes away from the player. Getting the ball to stop anywhere near the hole requires excellent touch – and sometimes a bit of luck!
Even finding the green in regulation won’t guarantee an easy two putt on this hole.
Hole 15
Peninsula
YARDS
PAR
STROKE
352
4
3
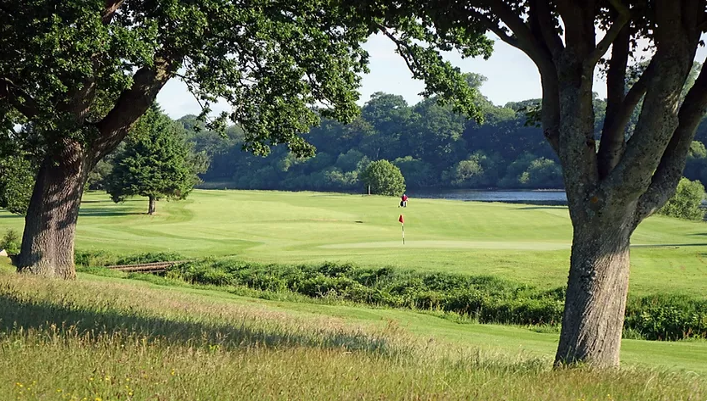
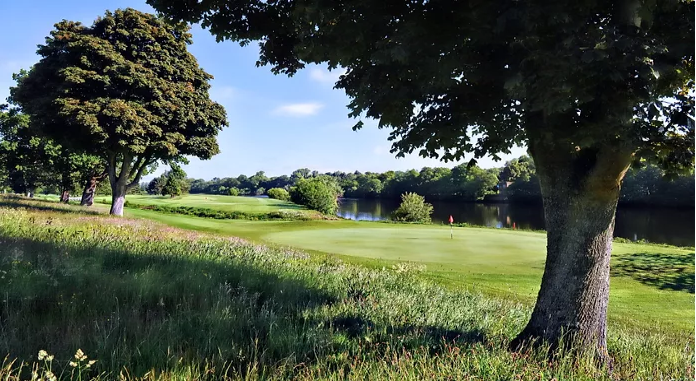
The main challenge on the 15th hole will become obvious as soon as you step onto the tee – the entire hole runs along the banks of the River Tay, surely one of the largest in-land lateral water hazards in the world! On the Peninsula, you only have one objective from the tee, to be hitting your second shot from dry land!
If you achieve that, then you are faced with an approach shot to a small green surrounded by trouble. The left edge of the green is still only a few paces from the river, while a burn which crosses the 17th hole, cuts in near the right hand side of the green much closer than it looks from the fairway. The green also slopes steeply from right to left, so bear this in mind and try to leave yourself an uphill putt – hopefully for par!
Hole 16
Chance
YARDS
PAR
STROKE
78
3
17
One of the most picturesque par 3’s you will find, the 16th is one of the signature holes of the North Inch course. At only 79 yards it can give you a birdie chance but you will have to earn it! The burn which cuts in at the 15th green continues directly across the 16th hole, so you have no option but to play over it while the Tay also sneaks in on the left of the green just enough to catch the eye and any pulled tee shots.
A deep bunker in front of the green means that if you take a direct line then you will have to take the aerial route. You can however aim to the right of the bunker with a lower shot and let the natural contours bring the ball back onto the green – just don’t go too far right or you’ll stick up on the hill!
The majority of the green is flat with the only slope being on the back right portion so aiming for the middle of the putting surface should leave you with a good look at a birdie putt – don’t leave it short!
Hole 17
The Pines
YARDS
PAR
STROKE
268
4
11
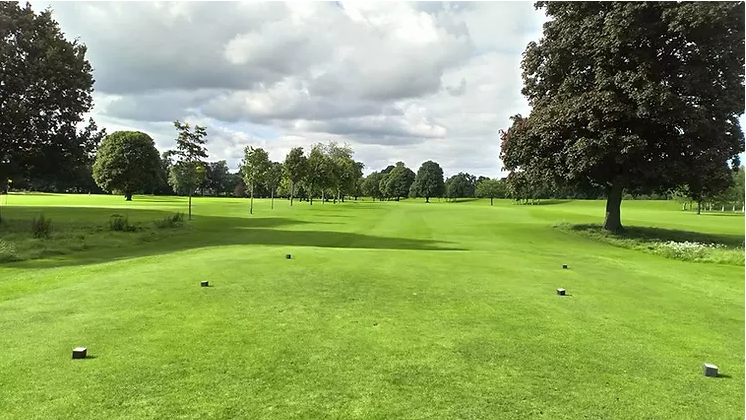
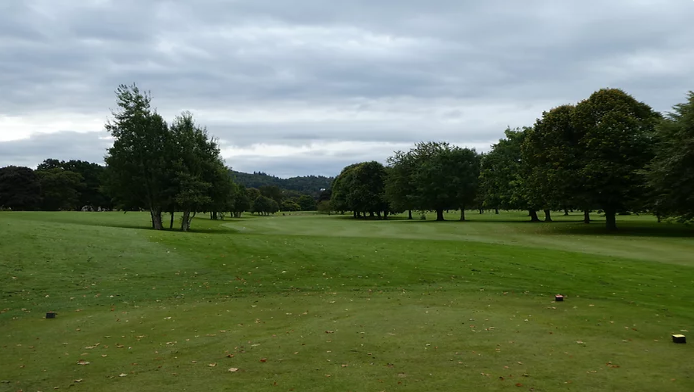
No 17 is another short par 4 which can be played any number of ways. The main features of the hole are the burn which crosses in front of the tee and runs up the left side of the hole, two fairway bunkers left and right and a copse of trees which cuts across the hole diagonally from left to right.
An iron or fairway wood from the tee will leave a mid-short iron into the green but you have to be accurate as this brings the fairway bunkers into play. The ideal line is slightly left of middle as this gives the best angle to hit through the opening in the trees that guard the front of the green.
In favourable conditions longer hitters might be tempted to aim for the gap in the trees and try to run one up to the green but with such a narrow opening to aim for and so many trees to avoid, this option is only for the brave!
The green slopes away from the player slightly so judging your approach shot can be tricky, especially as the trees can often block out your view of the flag. Just have to trust your yardage when playing this one.
Hole 18
Inch Hame
YARDS
PAR
STROKE
482
5
5
The finishing hole on the North Inch is a long meandering dog-leg par 5. From the tee up on the bank, you look down at a fairly wide fairway which gives you confidence standing over the ball. Trees line the right side of the fairway and separate the 18th and 3rd holes, so a tee shot which favours the left is preferable. This also opens up the dog-leg and gives you a clear view for your second shot.
From here it’s a long way to the green, so you have options. Whichever option you choose it is best to favour the right side of the fairway. An enormous tree around 40 yards from the green will completely block out anything hit towards the left so aim well right!
The two-tiered green sits above the fairway and slopes from back to front so it can be hard to get close to the pin. Try to leave yourself an uphill putt though as anything coming back down the slope can be treacherous!
Perth Ladies Golf Club
©2022 - 2024
